Tonal Inversion: a Special Case of Pigment Stain
Let's start with an example: a somewhat overpigmented mix of burnt umber produced this step print, with visible tonal steps of hardened gum (steps 1-5) then white (or more accurately, slightly toned) paper (steps 6-7) then stain (steps 8 and up). Some gum printers call this "tonal inversion" because the steps which should be lightest are darker than some of the steps below them. But it's important to realize that the "tone" on the higher steps is just stain, not tone in the usual sense.
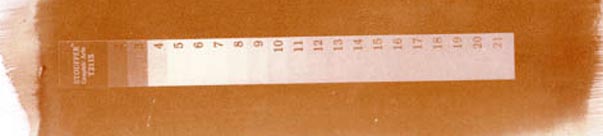
What seems to be happening is that steps up to 11 or so received enough exposure to harden some of the gum underneath them; you can see that the paper isn't white in steps 5-8 but is a slight tone, the lightest highlights of the tonal scale of the gum. There is enough hardened gum there to serve as a gum resist to repel the stain, so the excess pigment washes off those areas rather than being deposited as stain. As the hardened gum becomes less dense in steps 9-11, it resists less of the stain with each ascending step, and so the stain is darker on each of those steps. Then starting with step 12, there is no longer any hardened gum to resist the stain, and from there on, the stain is unchanged.
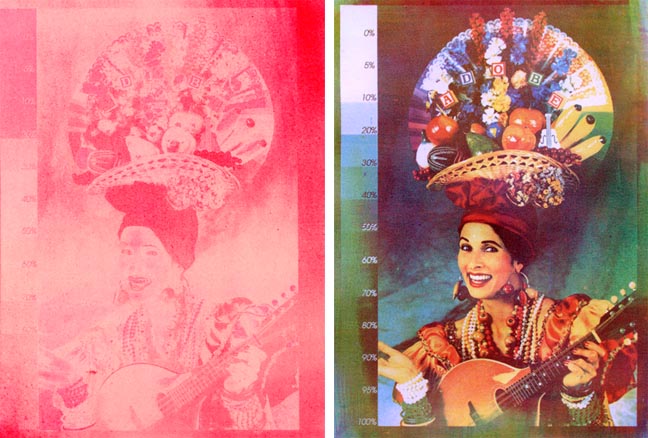
Here's how the same pigment mix looks, printed in an image:
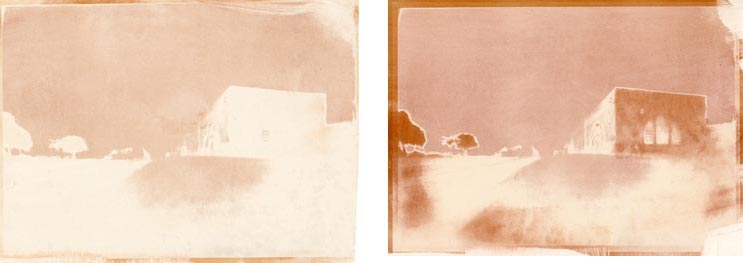
On the left print, the gum emulsion dissolved off the paper due to underexposure; all the "tone" seen on the print is pigment stain. This same effect can result from a coating that is so overpigmented that it flakes off, regardless of the exposure. The lightest areas are where the gum was exposed and partially hardened, creating a gum resist that repelled the pigment stain; the pinkish areas are stain, where there was little or no exposure. The print on right shows the same condition as in the step tablet above, where there is both some hardened gum in a positive tonal image, and the stain on areas of little or no exposure. If one wanted to play with this effect, one could probablylearn to control how much reversal of tone one would achieve by manipulating exposure and development, as long as the coating mix is overpigmented to the right degree to start with.
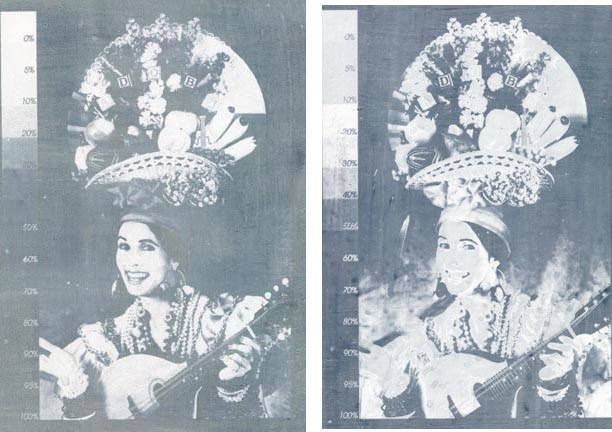
The remedy? The remedy for tonal inversion is the same as the remedy for any pigment stain that results from overpigmentation: use less pigment. With a less pigmented mix, the inversion simply doesn't appear. For example, you can see the same building depicted above (slightly different image) printed in burnt umber with a less pigmented mix here. Notice that the print that is properly pigmented isn't less definite, it's just less pigmented. This is a common misconception, that a properly pigmented mix is paler than an overpigmented mix; it's not necessarily so. You can print as saturated or deep a color as a pigment will print, without overpigmenting the mix; adding more pigment after that point simply creates problems without giving you any useful increase in density or color saturation.
The example below, I would call a borderline example of tonal inversion. To me, this is just stain, not inversion, since while the print is heavily stained in the light areas, the dark areas haven't flaked or washed off to create a true inversion, so to my mind it's marginal whether it should be included in this section. But the fact is that some gum printers would call this an inversion because what should be the lightest steps on the step tablet are darker than the steps just below. So, in deference to them, I will include this as an example of an inversion. But this unclear borderline between stain and inversion shows how closely they are related.